Picking a laser cutter for cardboard work feels overwhelming when you start looking at specs and price ranges. The market spans from $300 desktop units to $15,000 industrial machines, and honestly, most people either overspend or buy something that can’t handle what they actually need. When you’re trying to find the best cardboard laser cutter, you’re balancing power requirements, bed size, software compatibility, and whether you’re doing this as a hobby or trying to run production work. Getting this decision right saves you from expensive upgrades six months down the line.
Power Requirements and Laser Type
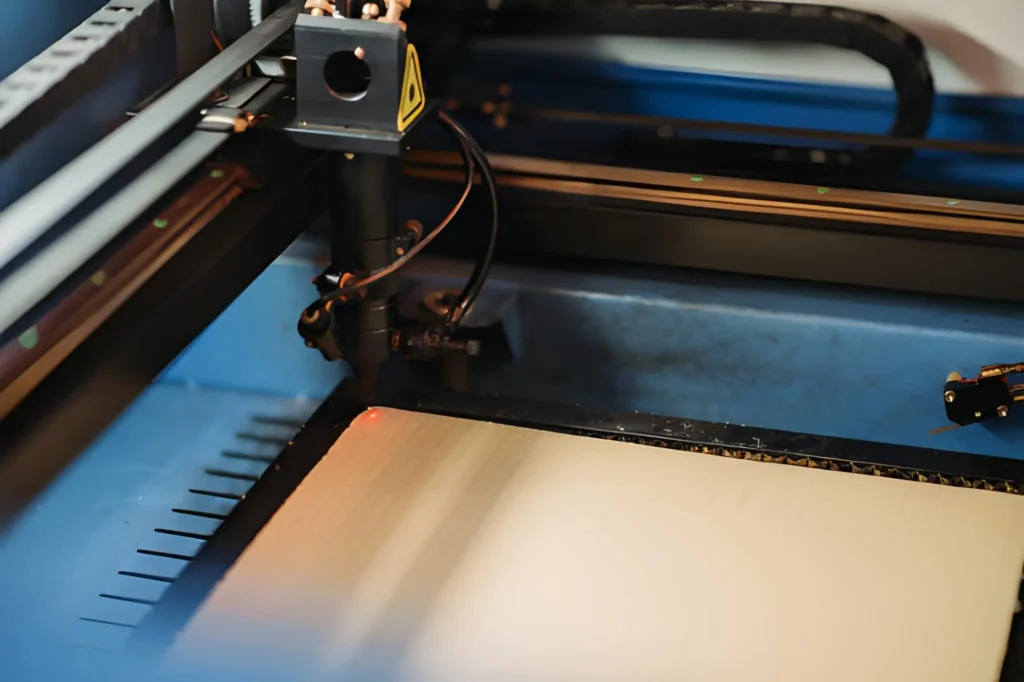
CO2 lasers dominate cardboard cutting because they interact with organic materials way better than fiber or diode alternatives. For single-wall cardboard up to 5mm thick, a 40-50 watt tube gives you decent speed without overkill. You’ll cut at around 25-35mm per second with clean edges. Double-wall corrugated bumps that requirement to 60-80 watts, and triple-wall industrial cardboard really needs 100+ watts to avoid multiple passes.
Diode lasers are cheaper but struggle with anything thicker than 2mm. They work at lower wavelengths (around 450nm) which cardboard doesn’t absorb efficiently. You end up with slower speeds and brownish edges. Some people use them for engraving or thin craft cardboard, but they’re not serious cutting tools.
Tube lifespan matters more than initial power ratings. Most CO2 tubes last 2,000-4,000 hours before dropping to 70-80% capacity. Chinese tubes on budget machines might hit 1,500 hours. That’s about 6-8 months of daily use before you’re replacing a $400-800 component.
Bed Size and Workspace Planning
The most common mistake is buying too small. A 300x400mm bed sounds fine until you’re trying to cut packaging prototypes or architectural models. Standard cardboard sheets are 1200x800mm, so smaller beds mean more material waste from offcuts.
For small-scale craft work, 300x500mm handles most projects. Production work or signage really benefits from 600x900mm minimum. Anything larger gets expensive fast—900x1200mm machines start around $8,000 and need proper installation with dedicated ventilation.
Pass-through designs let you feed longer material through the machine, which is useful for continuous patterns or oversized pieces. But setting this up requires careful alignment, and you lose some precision compared to working within a fixed bed.
Motion Systems and Precision
Belt-driven systems are standard on most machines under $5,000. They’re reliable enough for cardboard, giving you positional accuracy around ±0.1mm. That’s fine for most applications unless you’re doing super detailed work with tight tolerances.
Linear rail systems cost more but improve consistency, especially on larger beds where belt stretch becomes noticeable. High-end machines use rack and pinion drives that maintain accuracy across the entire workspace.
Stepper motors vs servo motors makes a difference in speed. Steppers are cheaper and adequate for hobby use, typically maxing out around 500mm/second travel speed. Servos handle faster acceleration and higher speeds (800mm/second+) without losing position, which matters when you’re running production batches.
Software and Control Systems
Ruida and Trocen controllers are industry standard on Chinese machines. They work with LightBurn software, which costs about $60 but handles pretty much everything—importing designs, setting parameters, managing layers. Open-source options like LaserWeb exist but have steeper learning curves.
Proprietary software on some branded machines limits your flexibility. You’re stuck with whatever features they include, and file format support can be annoying. Look for machines that accept standard vector formats (SVG, DXF, AI) without conversion headaches.
DSP controllers give you offline operation—load the file via USB and run without keeping a computer connected. GRBL-based systems need constant computer connection but cost less.
- Build Quality Indicators
Frame construction tells you a lot. Steel frames stay rigid under continuous use. Aluminum frames work okay for light duty but can develop alignment issues over time. Acrylic frames on super cheap machines are basically toys.
Check the optical path length and mirror quality. Longer paths mean more power loss. Machines using three mirrors instead of four reduce reflection losses. Silicon mirrors last longer than molybdenum but cost more upfront.
Also Read-Staying Ahead in Dental Practice: Continuous Education, Tech Trends, and Patient Care